

Before we dive in, why not take a quick peek at my portfolio: https://priyalraj.com, & while you’re at it, check out my SaaS venture: https://shavelinks.com, it’s where innovation meets simplicity.
Why Integrate Twitter with Your Next.js App? 🤔
Twitter is a powerful platform for reaching a global audience. Whether you’re building a social media dashboard, a marketing tool, or just a fun side project, integrating Twitter’s API with Next.js can add significant value to your project. Plus, it’s easier than you think! 💡
Need the code? Here’s the GitHub repo for you.
Step 1: Let’s setup “twitter-api-v2” Library in your Next.js project:
First, you need to install the twitter-api-v2 library in your Next.js project.
npm install twitter-api-v2After installation, add the following values to your .env file. You can rename this file later as needed:
TWITTER_API_KEY =
TWITTER_API_SECRET =
TWITTER_ACCESS_TOKEN_KEY =
TWITTER_ACCESS_TOKEN_SECRET =
Next, copy this function into your project to automatically post tweets when you want:
//! Auto post to Twitter
async function autoPostToTwitter(tweetData: string) {
    //! Keys for twitter-api-v2
    const client = new TwitterApi({
        appKey: process.env.TWITTER_API_KEY,
        appSecret: process.env.TWITTER_API_SECRET,
        accessToken: process.env.TWITTER_ACCESS_TOKEN_KEY,
        accessSecret: process.env.TWITTER_ACCESS_TOKEN_SECRET,
    });

    const twitterClient = client.readWrite; //! Used to write the tweets
    const data = await twitterClient.v2.tweet(`${tweetData}`);
}
Step 2: Fetch Your Twitter API Keys:
To access the Twitter API, you’ll need a Twitter Developer account. If you don’t have one, head over to the Twitter Developer website and create an account.
Once you’ve signed in, create a new app to generate your API keys and tokens. These credentials are crucial, so make sure to keep them safe! 🗝️
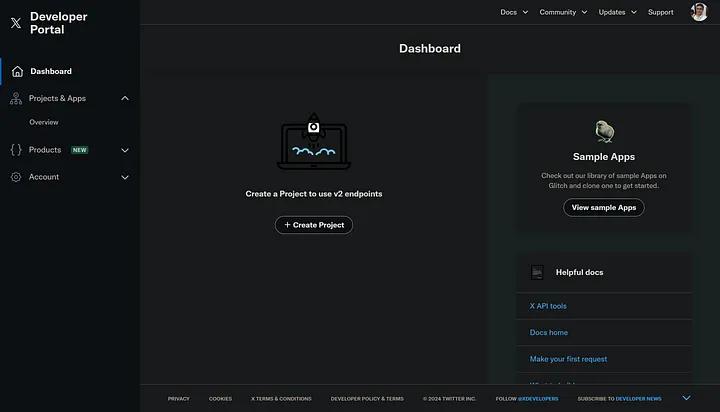
- Create a New Project: After logging in, your dashboard will look something like this. Click on “Create new project”.
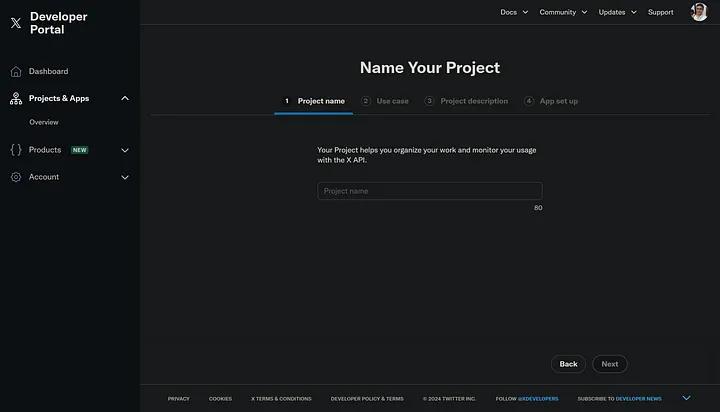
2.** Set Up Your App**: Follow the prompts to set up your app. This process is straightforward, just read the instructions and fill in the necessary data.
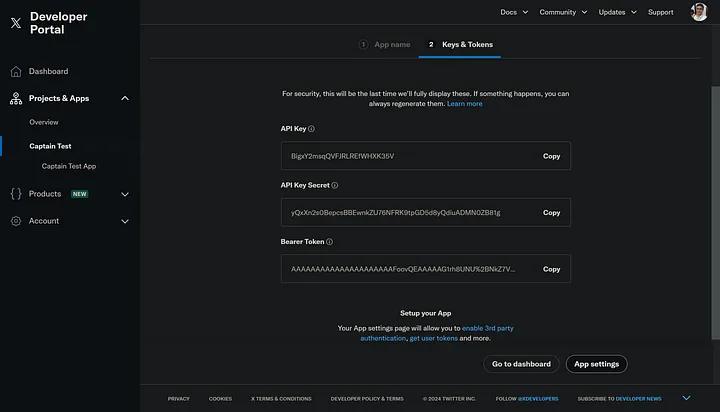
- Don’t copy API Keys: Once your app is created, you’ll see the API keys. However, don’t copy these values just yet. TRUST ME.
- Configure User Authentication: Navigate to “Projects & Apps” > “Your App” > “User authentication settings”. Click on “Set up” and follow the steps to configure authentication.
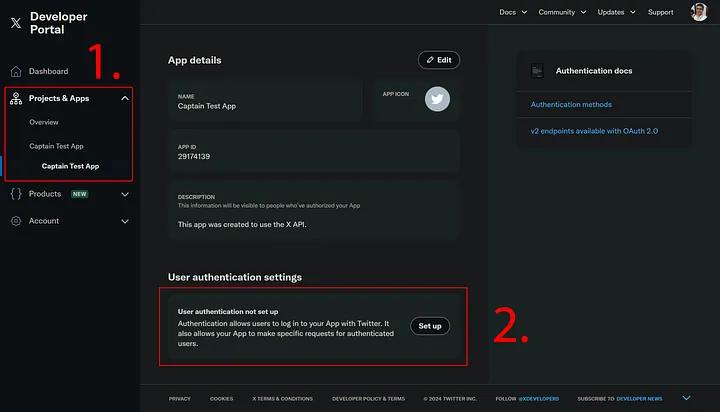
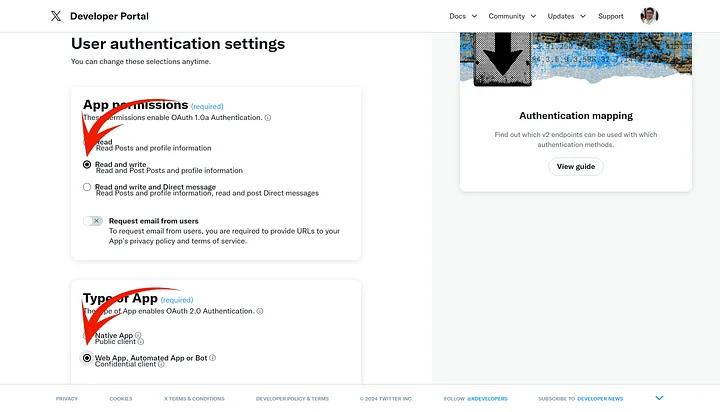
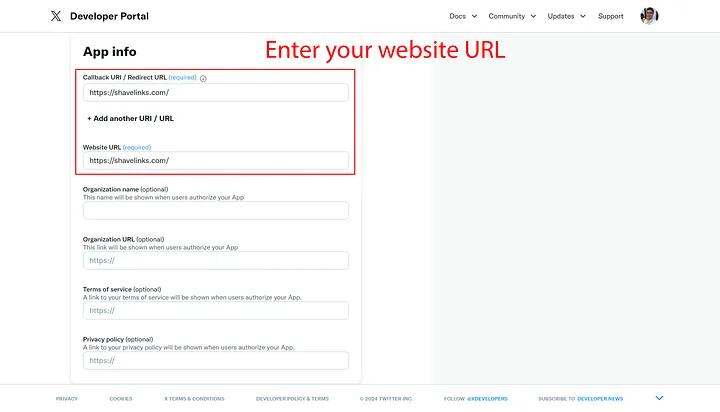
Save Your Changes: Make sure to save your configuration at the bottom of the page.
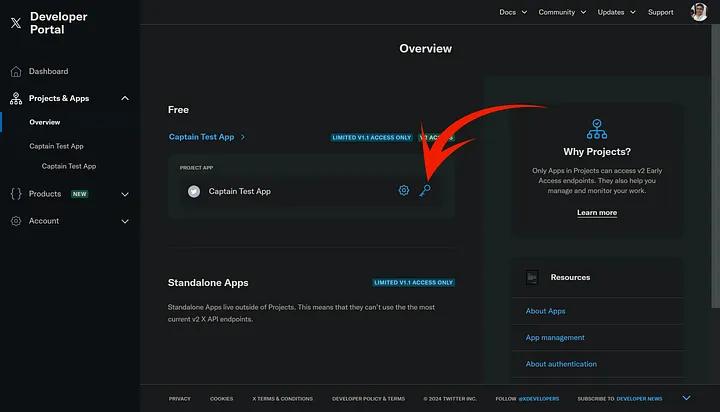
Regenerate Keys: Go back to “Projects & Apps” > “Overview” and click on the “Key” icon. Now, regenerate your “API Key and Secret”, and generate the “Access Token and Secret” keys. Paste these values into your
.envfile.
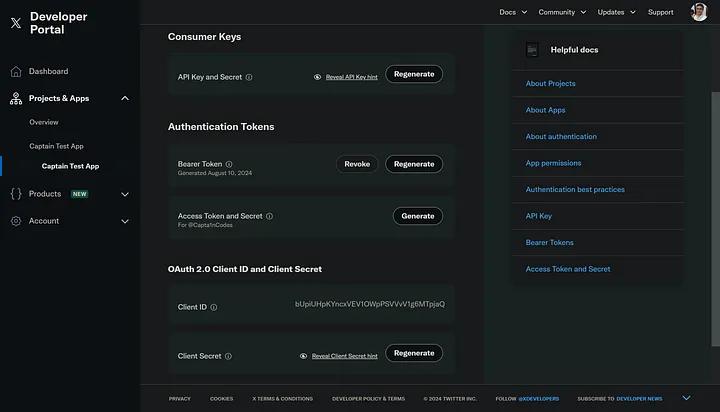
- Here’s an example of what your
.envfile might look like:
TWITTER_API_KEY = BigzY2msqQVFlJREWIHXK35V
TWITTER_API_SECRET = yQXln2oQBepseBBEwmVZUNFRFfX9qGD58qQdluADM02B18g
TWITTER_ACCESS_TOKEN_KEY = 1774585898413502464-op15i2cKw6kMFW53NlawqJCukSdFi4
TWITTER_ACCESS_TOKEN_SECRET = zxyeuWtYW7kOxp2DLZJA7L0s63CnP8bJhc1Elkyt3rP4G- With your
.envfile configured, you’re ready to hit the API and start posting tweets! Just pass the desired tweet content to theautoPostToTwitterfunction. Here’s an example of how to use the function:
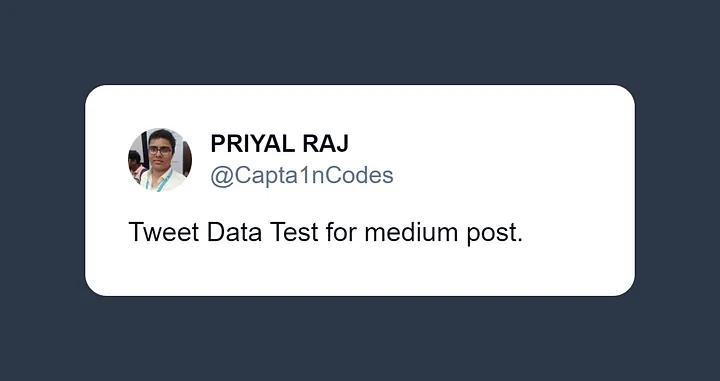
await autoPostToTwitter("Tweet Data Test for medium post.");Here is the result, showing how it will look.
If you enjoyed this article, please make sure to Like, Comment and follow me on Twitter.

Priyal Raj
Full Stack Developer with 3+ years building production web apps for founders and product teams worldwide. I write about Next.js, Node.js, TypeScript, Redis, and everything in between.